Loading…
Please be sure to watch the final production in the VIDEO tab above once released; in the meantime here is some behind the scenes footage:
Comedy Relief and Technical Tutorials. All you need for the end of the world.
Loading…
Please be sure to watch the final production in the VIDEO tab above once released; in the meantime here is some behind the scenes footage:
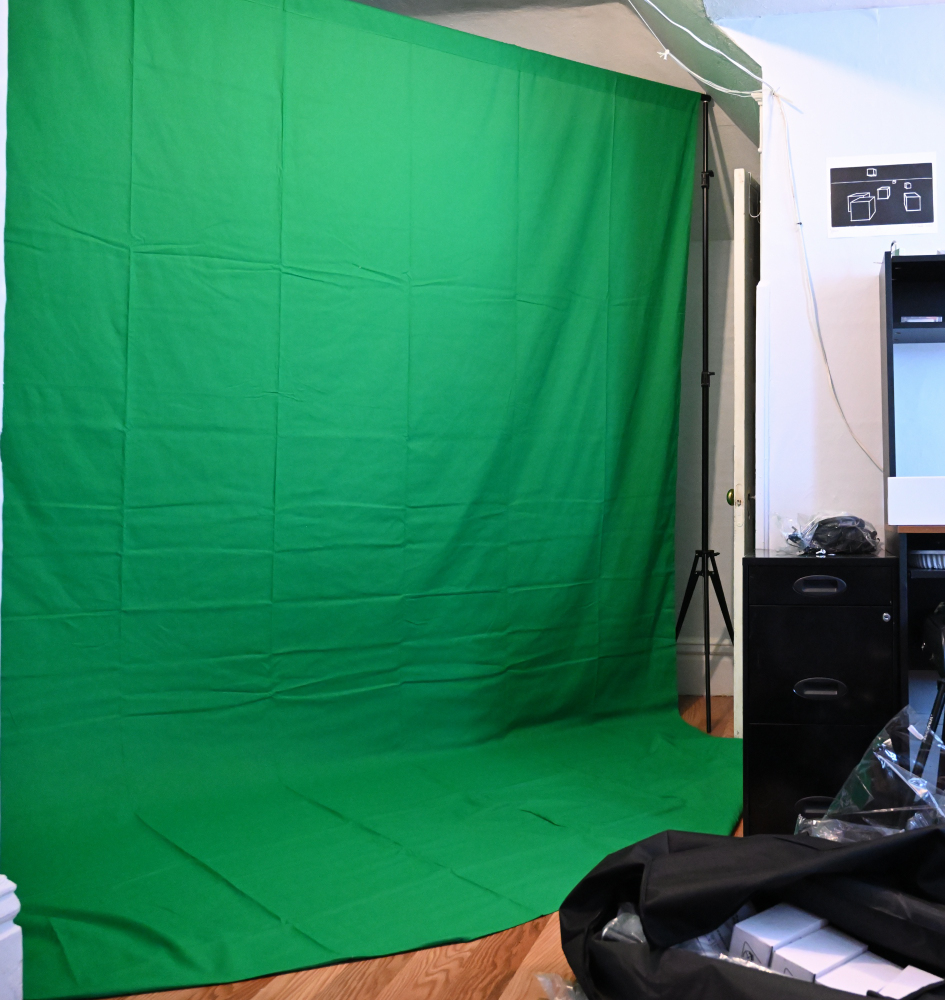
I am currently in the process of learning green screen technology based on the following thesis:
Green screen technology usage will increase my skit comedy
videos’ production value by enabling exotic images and absurd
cartoonish drawings to take the place of elaborate sets and
background scenery.
I picked up a fairly inexpensive setup from Amazon and have included a picture below:
Also, here are the links as to some of my research materials in order to learn this process:
https://www.youtube.com/watch?v=fboCu1_lQ2E
https://www.youtube.com/watch?v=sU4kw8fl-U4
https://www.youtube.com/watch?v=C-D4Q21VphY
https://www.premiumbeat.com/blog/chroma-key-green-screen-guide/
https://www.premiumbeat.com/blog/author/markvargo/
“What is Chroma Key?”. Lumeo.
“The Chroma Effect”. Chroma Key Tutorial. BorisFX.
Kathryn Ramey (30 July 2015). Experimental Filmmaking: Break the Machine. p. 70. ISBN 9781136071508.
Foster, Jeff (2010). The Green Screen Handbook: Real-World Production Techniques. John Wiley & Sons. ISBN 978-0-470-52107-6.
“Illusions Take Home First Oscars”. CRI English. 14 February 2005
“The Keys To Chromakey: How To Use A Green Screen”. Videomaker.
Ashihkmin, Michael. “High Quality Chroma Key”. University of Utah.
Cannon, Edward. “Greenscreen code and hints”.
And I have also picked up a new computer to edit on- a Windows PC. So I’ll have to make the switch from Final Cut Pro (only available on Mac) to Davinci Resolve.

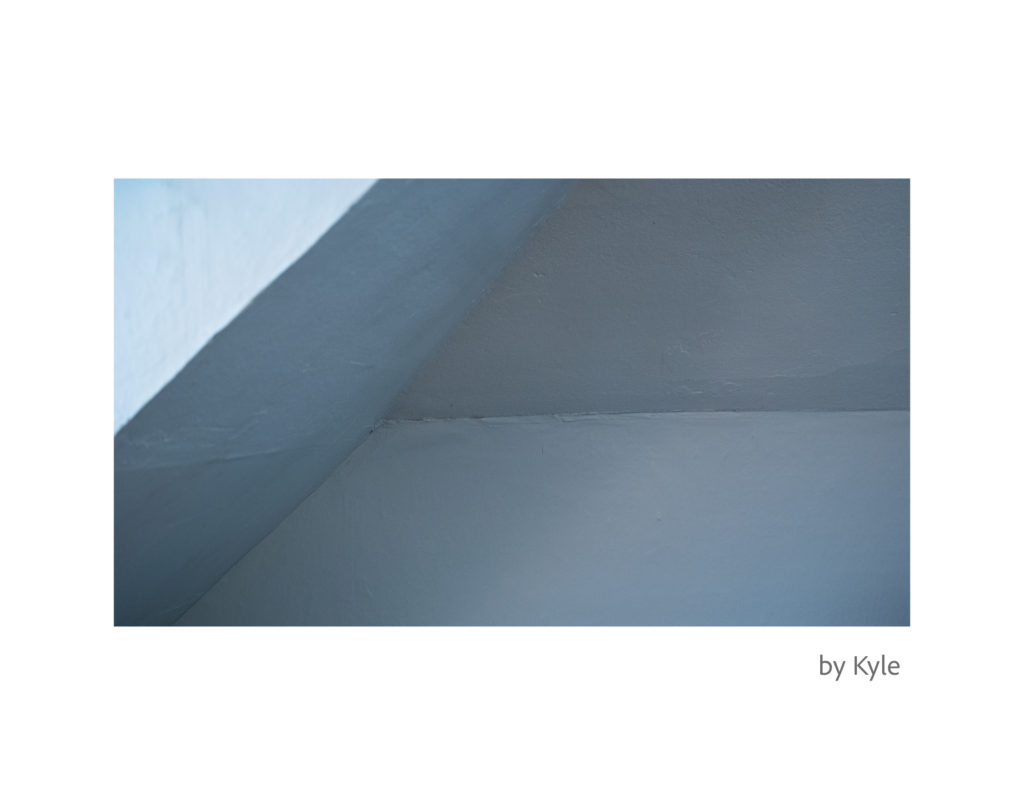
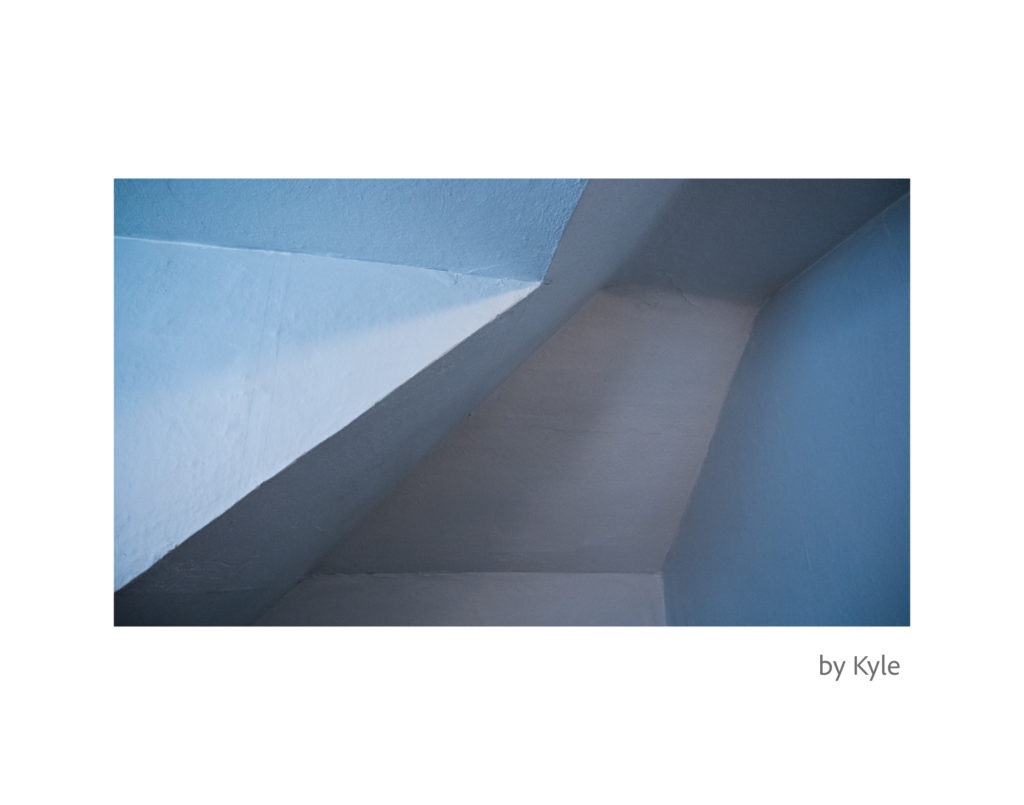
After receiving feedback from my instructor for the assignment, Principles & Elements of Design- which can be viewed in the previous blog post, here are the new final portfolio choices:
 Loading…
(final thoughts at end- please scroll to read)
What I learned from this assignment is that a strong figure to ground relationship of subject versus background can be created through many more means than just value or shallow depth of field- that ALL of the principles and elements play a role in making the subject stand out and can be used to that objective effectively.
Loading…
(includes a description at the end- please scroll to read)
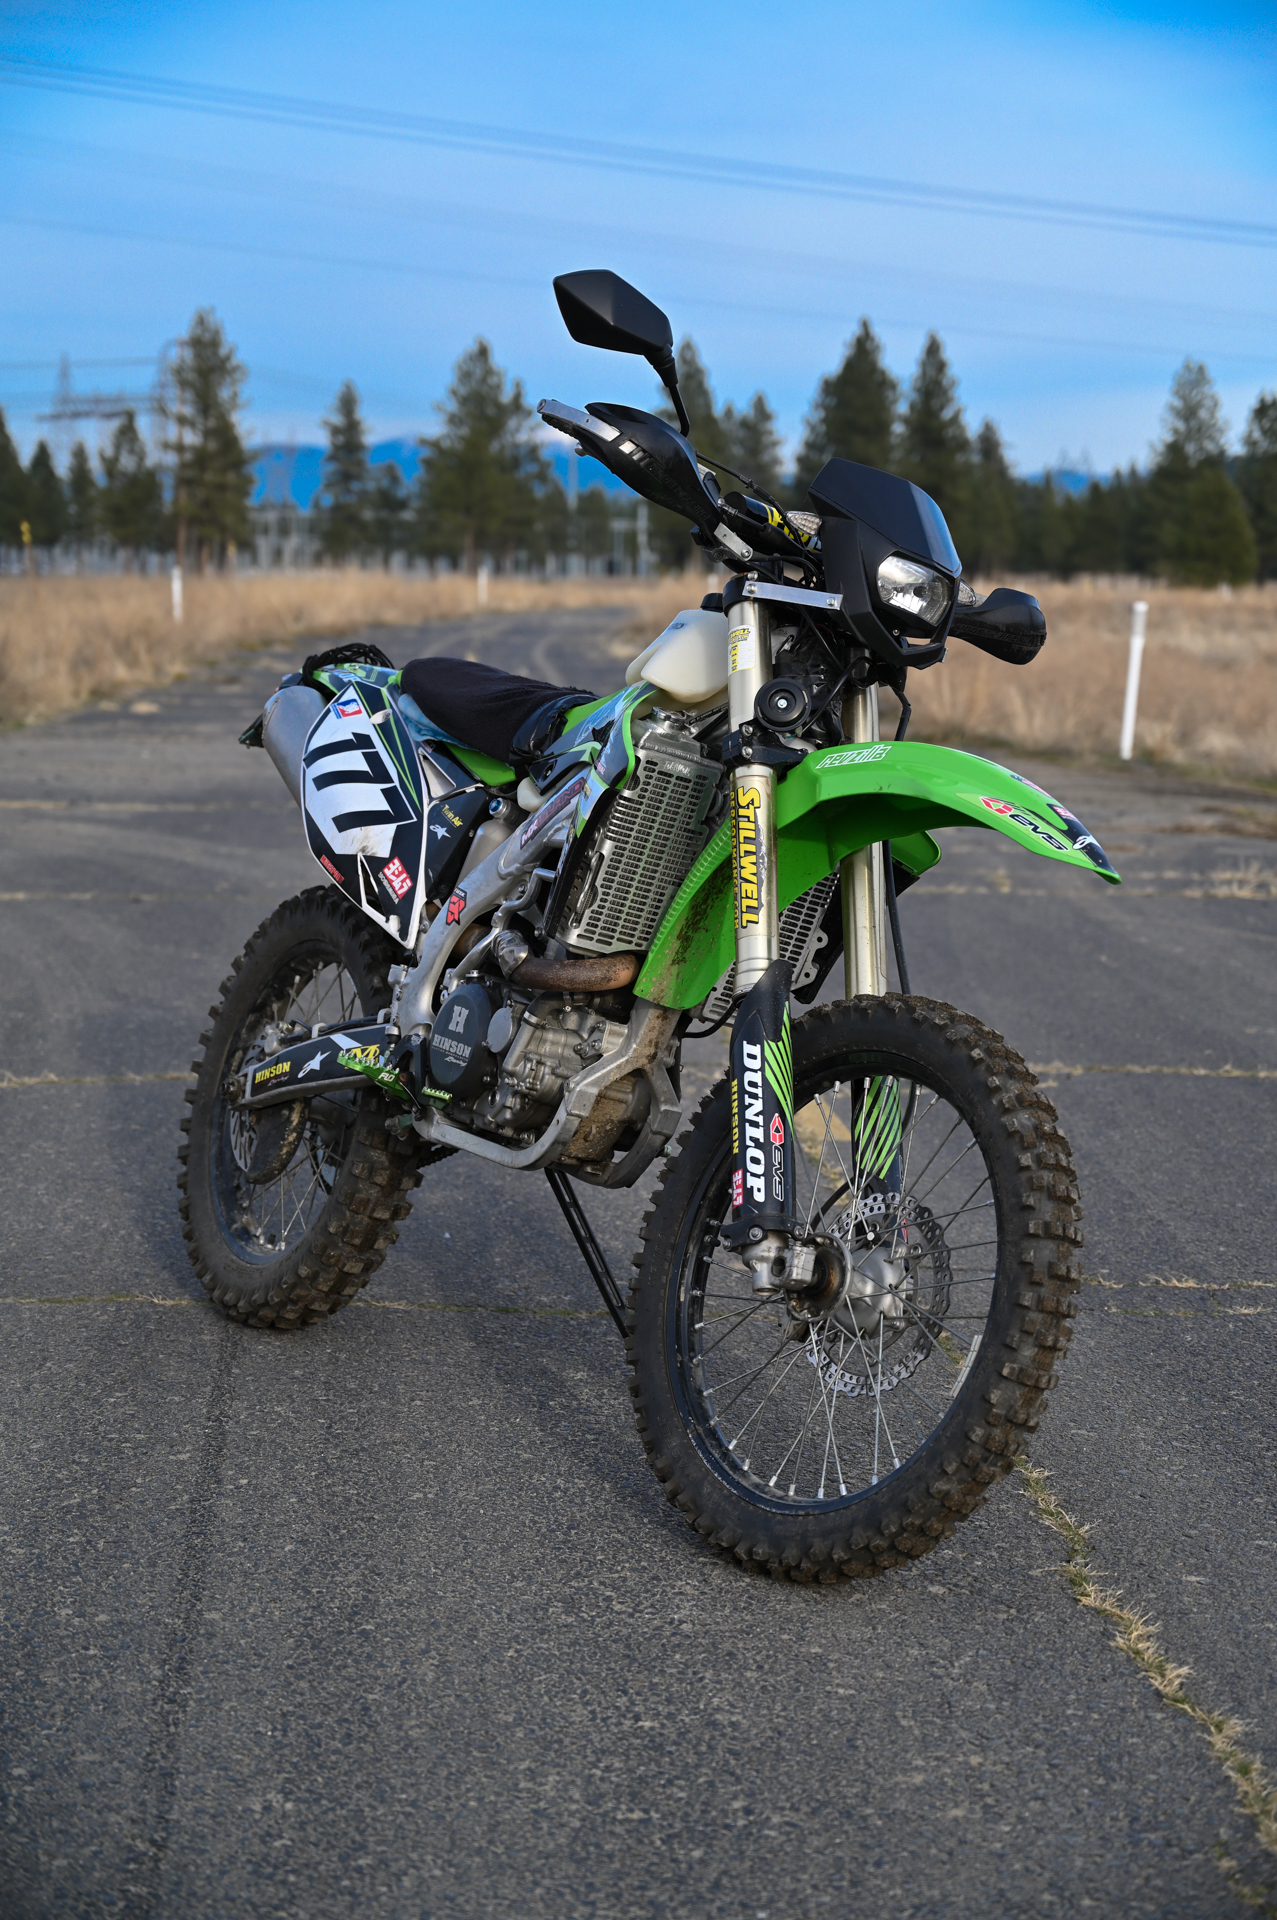
I added the “Boy Who Got No Dinner” as a slideshow on my homepage. It’s right below the main image, so just scroll down. Then, I moved the old slideshow to the “tutorials” page. I want to continue in this comedy AND tutorial direction a while still. The technical tutorial assignments are how I plan to fund my creative comedy endeavors (industrial videos and photo shoots). I am starting to finally get familiar with all of my new equipment, and after I get a new super powerful computer next quarter, I am confident that I can truly do a good job at both aspects- Comedy skits and Industrial type tutorials. I don’t want to combine the two though, necessarily- other than where they are found- my website/portfolio. Plus, I do all my own work on my motorcycle and van, I just need to start documenting it pictorially. I really like the obtuse direction my website and brand is in and want to defend it (it is distinct and acute enough being in those two directions). I just need to start pumping out material. And, when I can’t think of anything comedic, I’ll go out and document my bike maintenance. Hopefully, I can even add some paid industrial productions to the “technical” aspect of my portfolio.
KYLE, Dec 11 at 10:07pm
Reflections:
This was a really fun assignment for me. Shooting videos is why I’m in the digital media production program, but I’ve always wanted to be able to take good action photos, mostly for family.
After watching all the videos for the assignment, I then downloaded and watched some videos specific to the camera (the Canon 80d) I’m using with those settings mentioned in the assignment videos. Getting to know this camera better was really fun.
At first I set it to full manual with burst shooting (the Canon 80d does 7 frames per second). Then I used autofocus servo mode with face tracking on manual mode. Then I tried out the tV (time value) setting, which let me control the shutter speed while the camera did the rest.
It was really fun. I got some good pics in all the modes I tried. My only complaint after looking at the photos on the computer was from my framing- the feet were often cut off. I guess I was concentrating a lot on the face and hands. But, I still did get some good full body shots and the ones with the feet cut off I just cropped in even further, making them nice tight action photos containing the actual action- throwing a frisbee. Yay!
Anyway, my biggest takeaway is that this is the type of photography I am probably most likely to actually use when I am not shooting videos; even for portraits of family. I like the portraits that came from this WAY better than just having someone sit for a nice picture.
Plus, the sound of the camera rapid firing is awesome. I’ll play around with timing single shots more as I get better, but often when I clicked the shutter in single shot mode the camera wouldn’t take the shot. I think it was waiting to get focus. Thus, autofocus was not usable unless in multishot burst mode, which is way more fun for me anyway right now at my level of both shooting and knowledge of camera functionality.
Next time I shoot action, I want to experiment more with multiple levels of blur to the frisbee, while keeping the person clear/clean. I don’t really know how to keep his arm clear, while blurring the frisbee because at the point of release, they are both kind of moving at the same speed. I think that is where the single shot mode perfectly timed would come into play- catching the shot right as his arm slowed after release and the frisbee is speeding away. It would be the moment when the frisbee is about a foot away from his hand. As one of your videos pointed out, that exact moment is difficult to catch in burst mode and more practice with single shot mode would really pay off there.

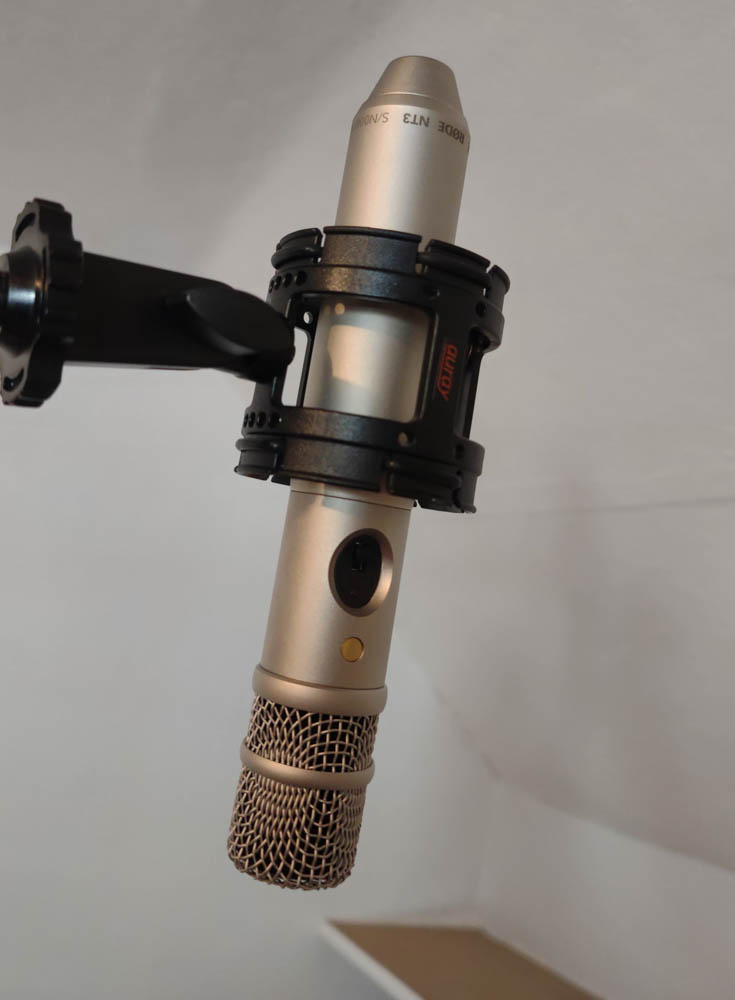
I ended up keeping the rode nt-3 microphone like I said in the last blog.
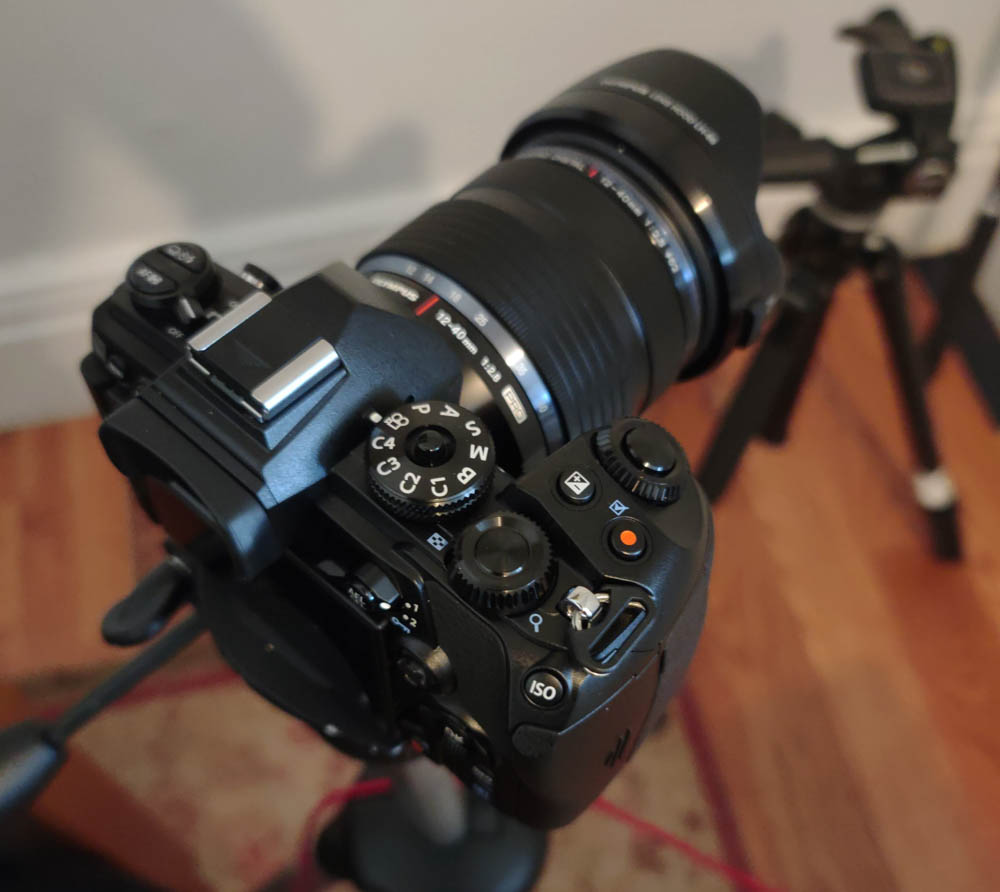
BUT, I returned the camera- the Olympus OM-D EM-1 mark III. Don’t get me wrong, it is an amazing camera. It just turns out that most of my work is indoor dialogue and the micro-four thirds sensor size doesn’t give me the shallow depth of field that I’m looking for in such a close environment. I’m just going to have to go with a full frame camera after all, even though full frame cameras often have a lot of jello effect caused by rolling shutter during pans and gray action scenes. That’s why I chose the Olympus- it has no rolling shutter artifacts, thus making it best for action and long distance, like sports and wildlife footage.
But, since I am not doing panning and action scenes anyway, I think I’ll be better off with a full frame camera and it’s shallower depth of field for a more dramatic/cinematic look.
I have decided to pre-order the Nikon Z6 II that is scheduled to start shipping sometime in November (2020).
I called Nikon and asked about their return policy in case I don’t like it. They said they don’t accept returns once the box has been opened- unlike Olympus, which accepts returns up to 45 days even after trying the camera out. So, I will have to get it from Adorama in order to protect myself with their 30 day return policy.
I seriously considered the Sony a7III but decided against it mostly because there is no way to see yourself for framing shots alone. Some of the camera’s most important autofocus features become disabled when an external monitor is connected.
The Nikon should work fine when I add an external monitor. At least I hope so- I guess I’ll find out.
Here are some links to the new Nikon Z6 II:
https://www.nikonusa.com/en/nikon-products/product/mirrorless-cameras/z-6ii.htm
https://www.adorama.com/nkz6m2.html
https://www.bhphotovideo.com/c/product/1598721-REG/nikon_1663_z_6ii_mirrorless_digital.html
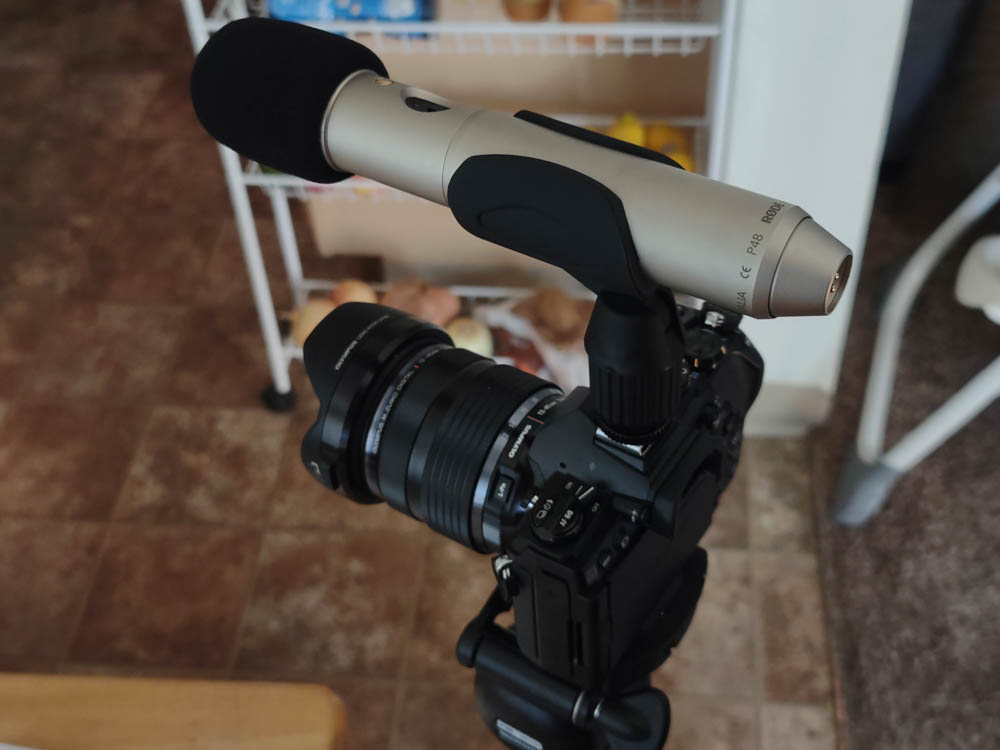
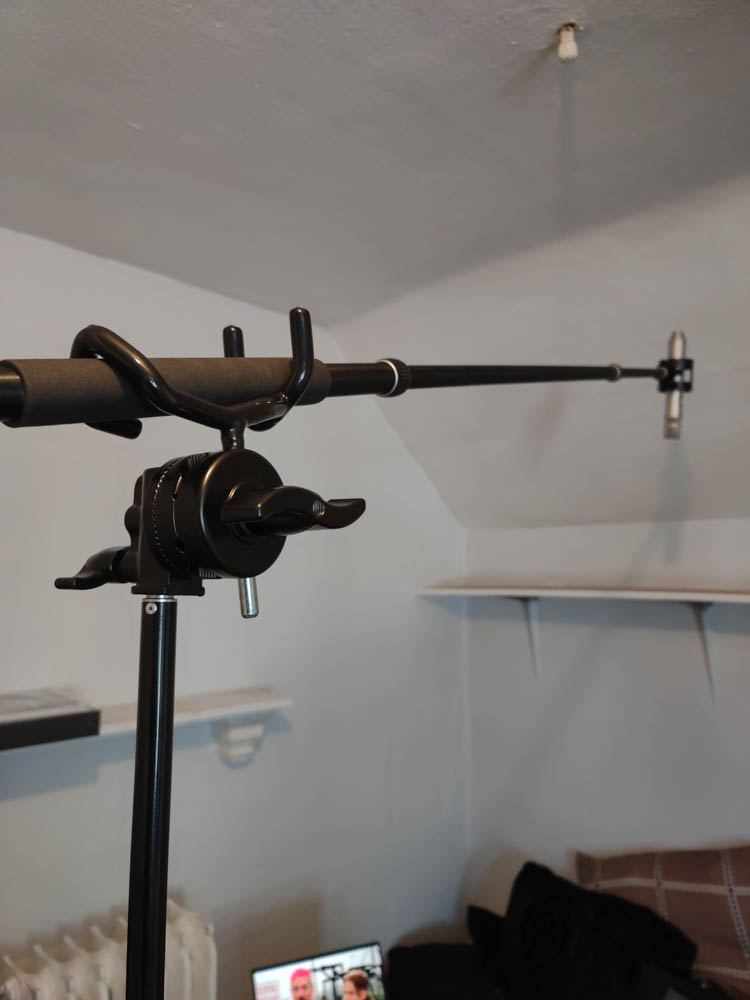
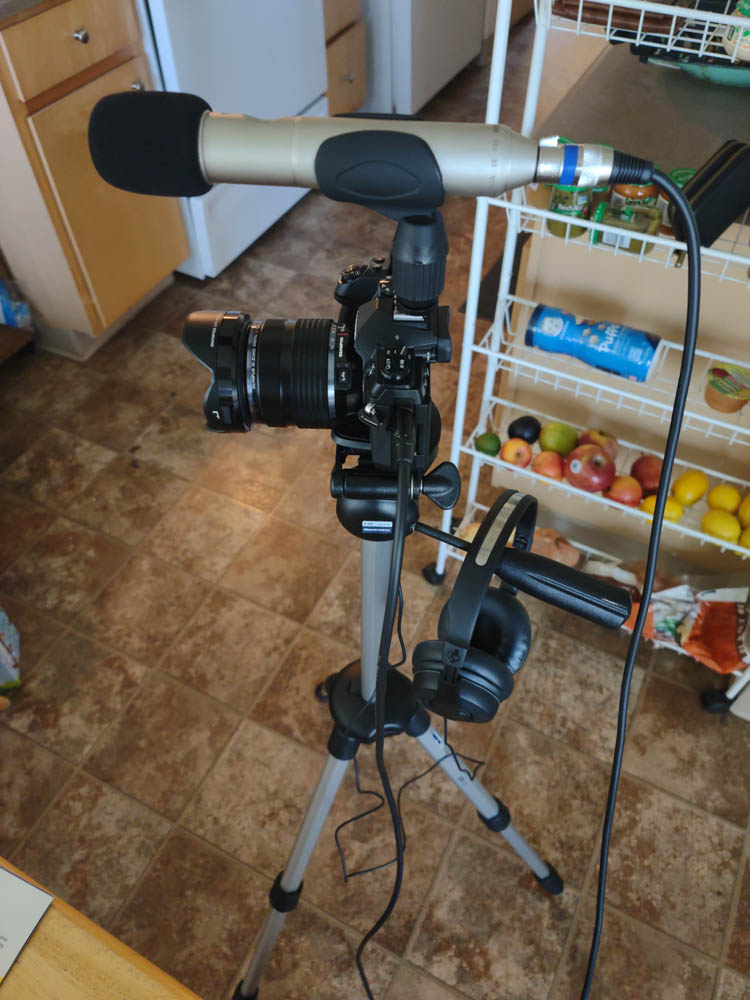
Here is a video I produced in order to test the sound of the Rode Nt-3 microphone as a boom mic and an on-camera mic. Its on-camera prowess is specifically compared to the RODE VideoMic Pro in the video.
The following conversation is in regards the video posted above and took place between myself and my Instructor at Spokane Falls Community College, Ira Gardner. In it, we discuss the possibility of keeping this microphone and why. –
The test came out pretty well. I’m super hard pressed to make a decision but I’m leaning on finding another $300 somewhere to get the Audio-Technica AT4053b.
But, at the same time, I feel that this mic (the Rode NT-3) sounds really good and I might miss the extra leeway in positioning the mic overhead of actors- being that it is a cardiod vs the hypercardiod Audio-Technica.
Do you think the hypercardiod Audio-Technica will really make that much of a difference in room reverb and refrigerator noises?
Hi Kyle, The difference between the RODE NT-3 and the RODE video mic pro is night and day! The NT-3 sounds much more alive and natural with a rich mid-tone and bass that is much improved over the old RODE. Now as to whether or not the Audio Technica mic is worth the extra money… to my ears it isn’t. Listening to this side by side test I thought the NT3 sounded better:
https://www.youtube.com/watch?v=BUHoWLemleQ&lc=Ugi2SQ_nZjJt3XgCoAEC
In my opinion Hypercardiod mics are best used to capture foley sounds and not for dialogue. I would use hypercardiod mics to get individual instruments in a studio recording session or to get isolated background noises to spice up the audio later on in post-production.
Just my two cents worth of feedback.
-Ira
I might have to just keep the NT-3. As long as I control off axis noises like washing machines, refrigerator, people talking in background, then it does actually sound better. Hypercardiod mics seem to sacrifice some sound quality in their quest for off axis noise reduction. But, that loss of sound quality actually improves the sound when the room has a lot of natural reverb and echo like hardwood flooring etc.
One of the best features of the NT-3 though is that it takes a 9v battery for when you don’t have phantom power. Thus, making it the ultimate run and gun on-camera mic. So, even if I get one of the more expensive mics next quarter, I think I’ll still have uses for this one. All the other mics recommended for indoor booming take phantom power only so portability is shot. Plus, I really like the way the nt-3 sounds on-camera. And, that eliminates a lot of hassle with booming a set every time
I think it will work really good for people to clearly hear my comedy lines coming from my mush mouth.
Thanks for your input. I spent all morning trying to justify keeping it just because of the 9v battery vs phantom situation. I think you just pushed me to go ahead and use it.
Good choice.
So, after a long summer being broke, Fall quarter at school finally arrived along with my much anticipated financial aid. Being that I’m a Digital Media Production major, I decided to invent in some gear.
My focus is primarily video, but I still (pun intended) want to be able to take quality stills. To that end, I chose the fairly expensive (for a micro 4/3 camera), the Olympus om-d em-1 mark III. Although, I am just getting started with it, my initial impression is impressed. It appears to be living up to it’s hype. It is pretty much, the only stills camera that can do 4k video with no noticeable rolling shutter effect. And, it has an incredible bit rate (237 mb/s, IPB compression) in c4k 24p.
I will keep this blog updated with information regarding this camera appointment with all of my equipment as time progresses. One thing I can say right now is that the camera I am for sure keeping.
The microphone I chose though, the Rode NT-3, quite possibly is going to be returned to Adorama. It was to be used as an indoor boom mic, but seems to have too much natural room reverb for my taste- not much better than the shotgun mic that I used last quarter for indoor dialogue.
I chose the mic due to budget constraints after reading about it first in the questions and answers at the end of the following indoor boom dialogue microphone reviews at B&H:
https://www.bhphotovideo.com/explora/pro-audio/buying-guide/interior-dialog-boompole-microphone-roundup
I am going to probably just have to save up another 300 dollars for one of the more recommend mics in the list, like the Audio-Technica AT4053b, which reportedly has very little room reverb and/or echo.
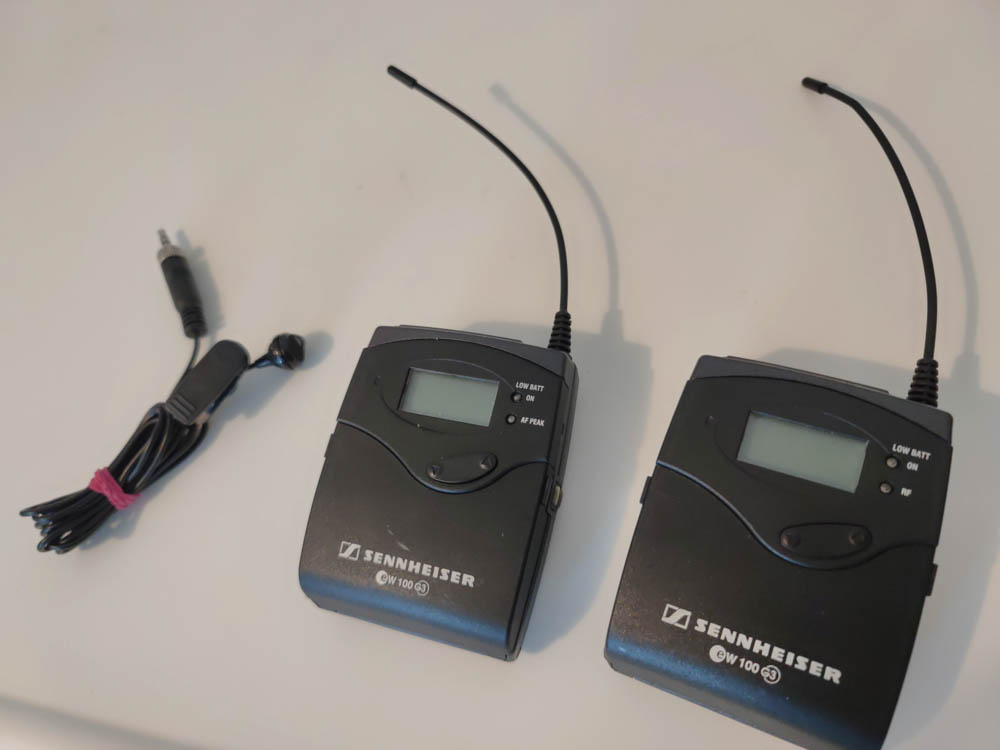
In the meantime, I want to get a second lav system and a small camera cold shoe mounted mixer like the tascam DR-60DMKII. Then I can record dialogue using the ADR like sound of sennheiser lavs. I guess my actors will just have to have wardrobe constraints.